The following is a brief step-by-step guide for how to put and edit hyperlinks in WordPress.
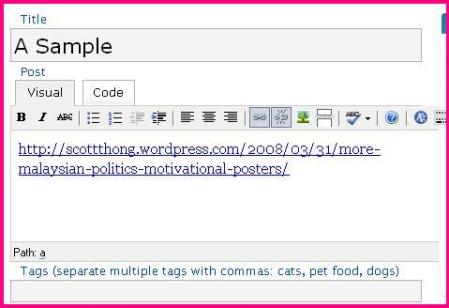
In WordPress, you an just copy and paste a link onto the text editor. It will appear as a link.
Then you can just select the middle…
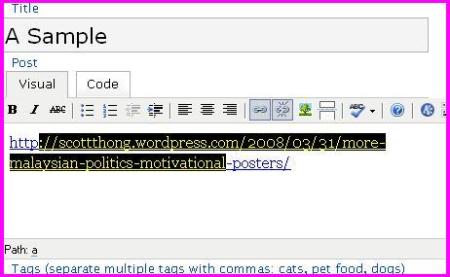
And replace it with any text you want.
For the last letter of the link, you cannot just BACKSPACE to remove it – you must select that letter then BACKSPACE it, or the whole link will become ordinary text.
Remember that you can press Ctrl+Z on the keyboard to undo any mistakes!
If you want a more precide method, do the following (click on the link to view full post if nothing follows):
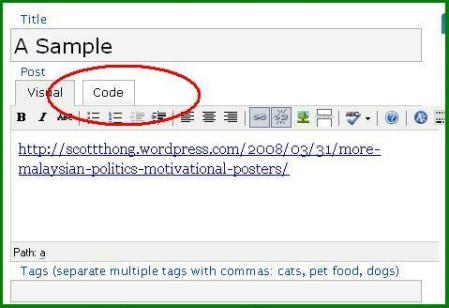
Paste your link onto the Visual text editor. It will appear as a link, same as before.
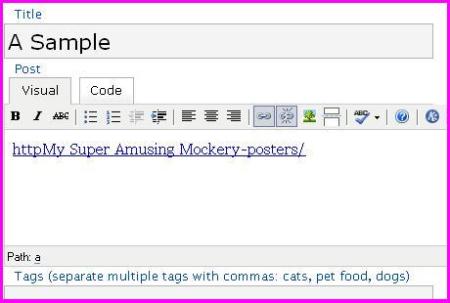
Now click on the Code tab.
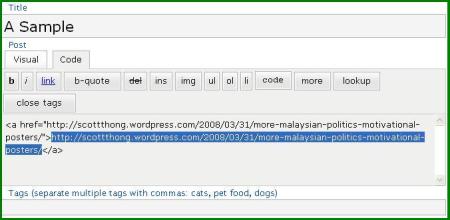
This is what you’ll see. I’ve expanded the window so you can see the entire HTML code.

Now select this area, between the two arrows. This is the text your link will show on screen.
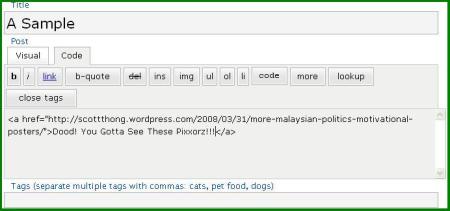
Change it to anything you want.
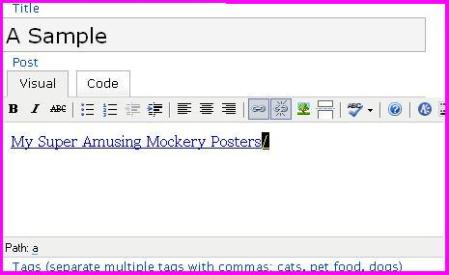
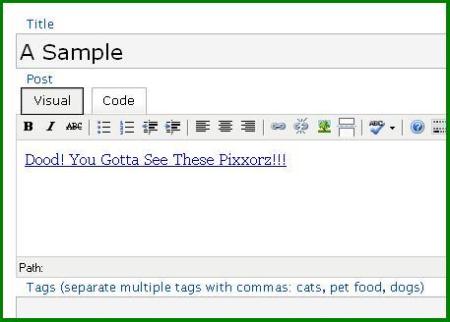
Click the Visual tab to see your results. Easy!
The second method is what I normally use. You can copy and paste the link into Visual, then open up Code, then copy and paste the loooooooooooooong title of the page into the HTML area. Saves a lot of typing.
For commenting however, I recommend you memorise the very easy HTML code so you can just type it out without having to look up the code every time.
Here’s the code:

See? So simple! Just go to the comments, type the first nine characters (including the space), then paste your link, then the next two characters, then your link name, then close with the last three characters.
Much more impressive and easy on the reader than just pasting raw HTML links.
And that last one works for any blog or homepage, so enjoy!
Tags: Wordpress FAQ, Wordpress how to, Wordpress HTML, Wordpress hyperlinks, Wordpress links

January 10, 09 at 11:05 am
http://www.youtube.com/watch?v=81_rmOTjobk&hl=en&fs=1
January 15, 09 at 8:21 am
I hope you don’t mind if I Test this!
December 11, 09 at 1:34 am
Test
February 15, 10 at 7:28 am
portmantest
(this comment is just testing using anchor/href html tags in a wordpress comment)
February 20, 10 at 11:52 am
Good to know…
March 9, 10 at 12:40 am
Thank you very much. Neat explanation.
June 27, 10 at 5:25 am
Great easy-to-follow explanation 🙂 THANKS!!
October 20, 10 at 4:04 am
[…] https://scottthong.wordpress.com/2008/04/01/how-to-do-hyperlinks-in-wordpress-pictorial-guide/ […]
October 31, 10 at 5:26 am
Yes, a great, easy-to-do explanation! Thank you so much!
November 2, 10 at 5:44 pm
thanks!
November 9, 10 at 7:31 pm
test
November 10, 10 at 1:35 pm
[…] I wanted to do my first hyperlink (thanks to the inspiration of Annie’s post), and I thought this would be […]
November 27, 10 at 12:39 pm
test
January 17, 11 at 9:15 am
Thanks for your useful post!
March 18, 11 at 1:49 am
Test comment
March 18, 11 at 1:51 am
Hope this works.Thanks for letting me test
April 2, 12 at 2:21 am
noob test
Thanks for the how-to!
October 1, 12 at 10:30 am
Test
February 4, 13 at 7:01 am
This is not a HYPERLINK, but just a plain LINK. Change the title, you’re spamming!
April 3, 14 at 2:06 pm
Thank you so much. This was a great help.
June 26, 17 at 3:04 pm
This has actually been one of the top articles i have read. It was actually really informative.Looking ahead for more blogs of this in near future